![R4C Logo - Horizontal -Vec - Full Colour.svg]](https://service.rapid4cloud.com/hubfs/R4C%20Logo%20-%20Horizontal%20-Vec%20-%20Full%20Colour.svg)
Welcome, in this comprehensive guide, we will provide you with everything you need to know to make the most of your RAPIDTest trial experience.
RAPIDTest is the ultimate, secure solution for Oracle testing designed to streamline and accelerate the testing process, ensuring the highest level of accuracy and reliability for your current instance and the next Oracle quarterly update. Finally, you can say goodbye to the tedious and time-consuming process of manually testing your businesses modules.
To get started with your RAPIDTest trial, follow these simple steps:
TABLE OF CONTENTS:
1. GETTING STARTED WITH RUNNING RAPIDTEST
1.1 SELECT THE REQUIRED MODULES TO TEST
1.2 EXPLANATION OF THE MODULES TEMPLATES
2.1 SUBMIT RAPIDTEST
1. GETTING STARTED WITH RUNNING RAPIDTEST
To get started with running RAPIDTest, the user would need to download our out-of-the-box template. These templates can be downloaded from our platform as an excel file.
Articles
1.1 Select the Required Modules to Test
1.2 Explanation of the Modules Templates
1.1 SELECT THE REQUIRED MODULES TO TEST
Once the account on the Rapid4Cloud Platform is created [you will have received a Welcome Email], begin by downloading the module templates from the platform and complete the small amount of required data as detailed in this document.
Log into to the Rapid4Cloud platform. At top of the dashboard menu, click ‘more’ and select ‘download’. The dashboard may look a little different to the screen shown as it varies based on the number of products subscribed to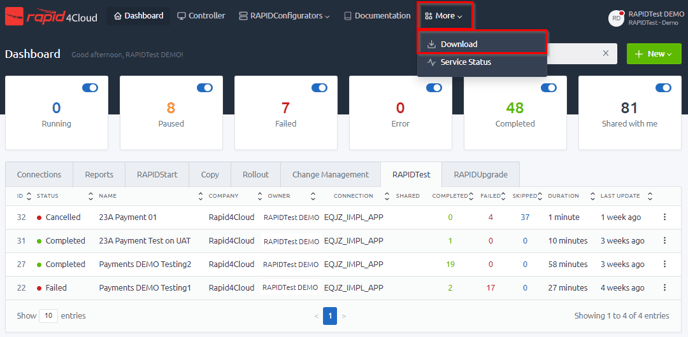
In the download window, select the product ‘RAPIDTest’ and select the appropriate Oracle version. It is important to select the correct Oracle version as the template formats may vary between the versions.

After selecting the Oracle version, the list of module templates will display in ‘Files’. Select Cash Management or Receivables module template(s) and it will download as an excel file. 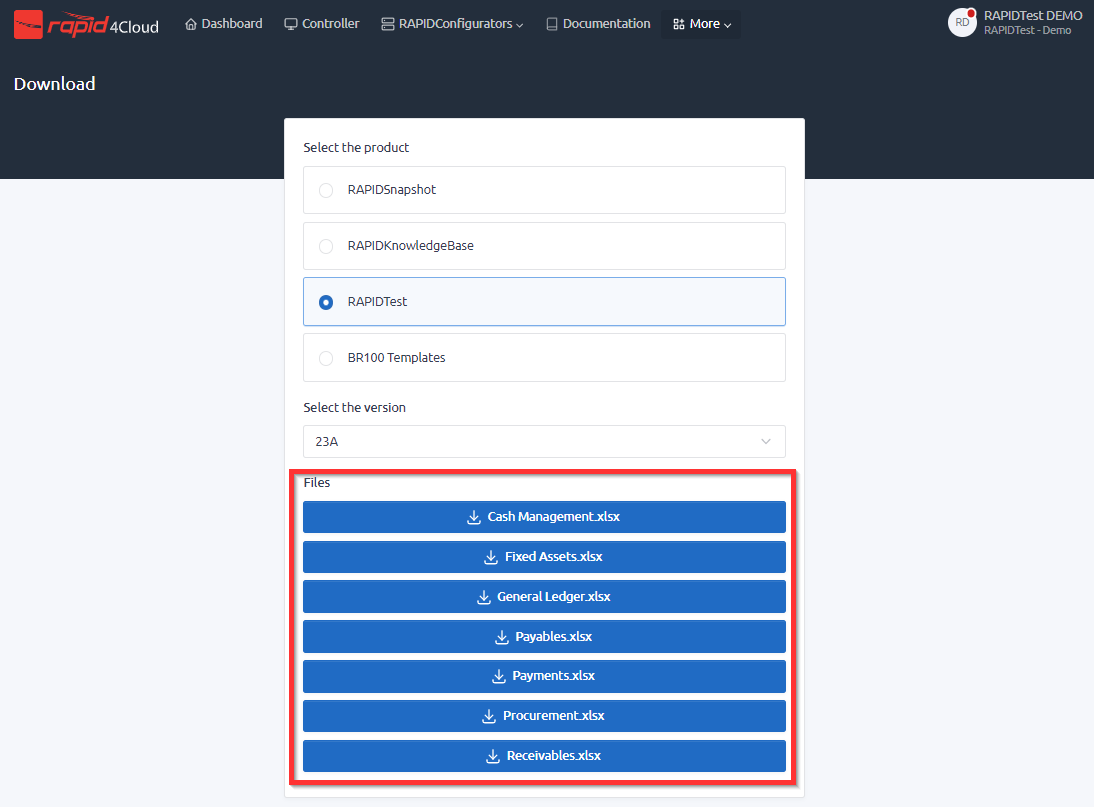
For the purposes of this TRIAL only CASH MANAGEMENT or RECEIVABLES should be selected as they have been setup to work with the Oracle Vision Demo data.
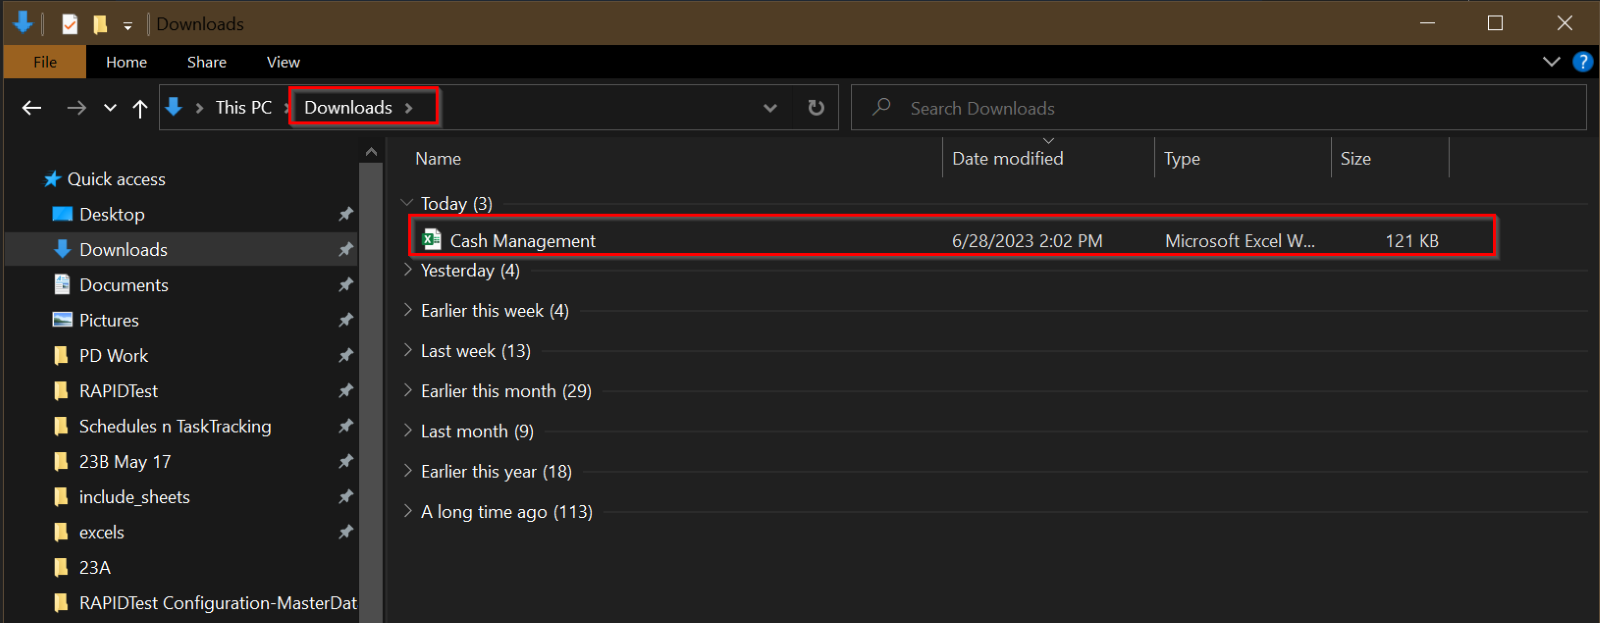
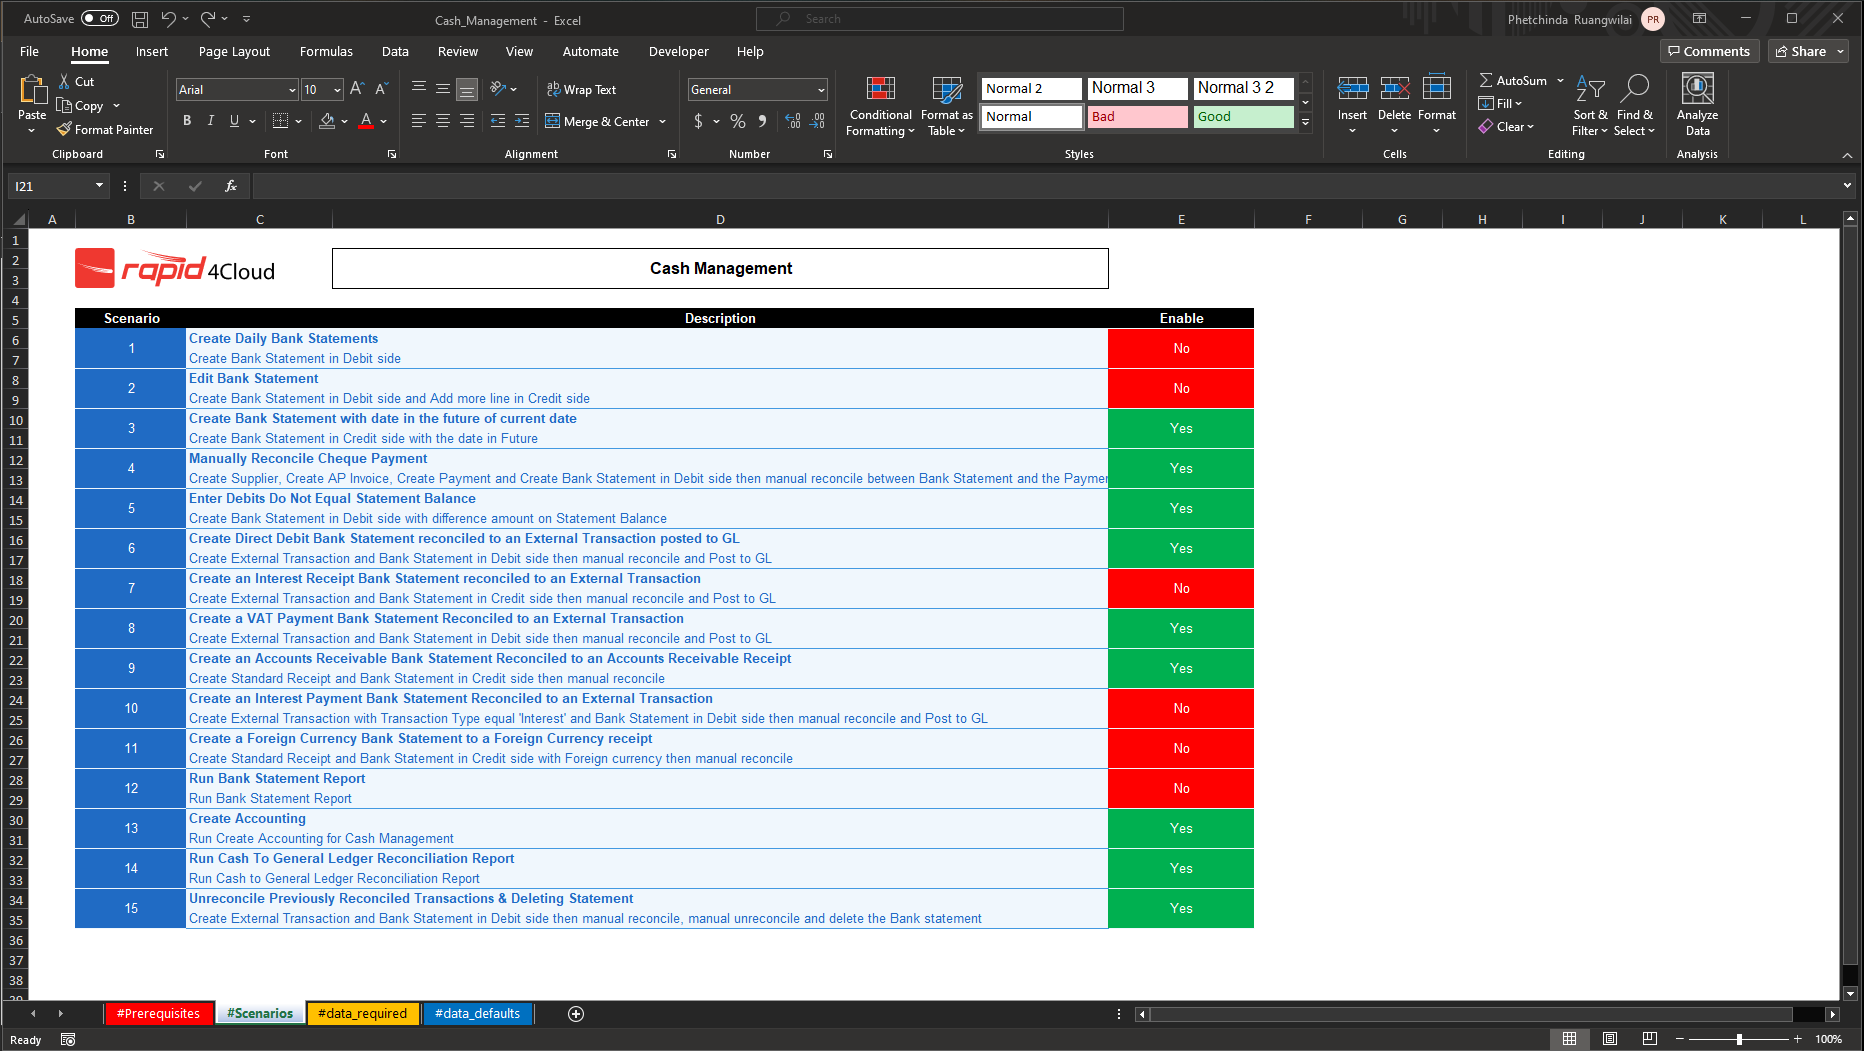
Once downloaded from the platform, open the template and you will notice that within each module template, there are 4 sheets provided.
1.2 EXPLANATION OF THE MODULES TEMPLATES
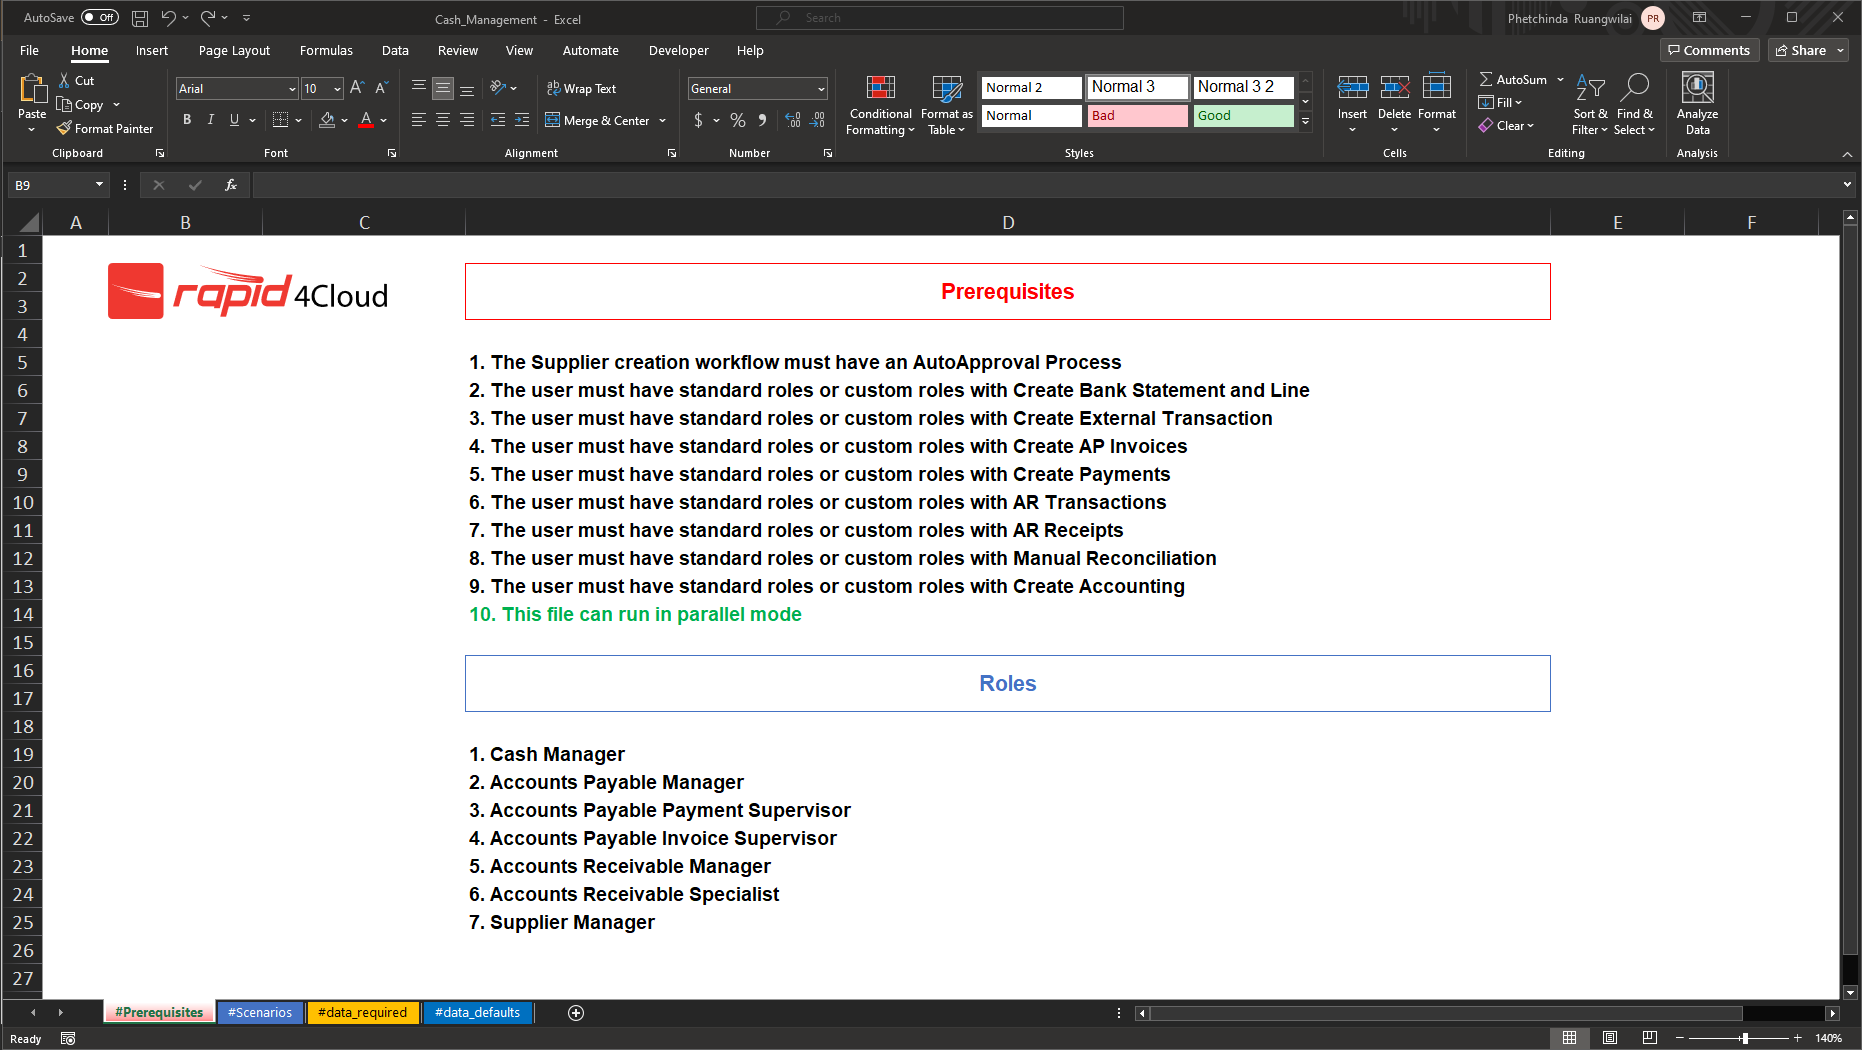
Within each module templates, there will be 4 sheets provided for your use.
- Prerequisites: provides a list of requirements that are needed to work with your instance however these have already been taken care of for your trial.
- Scenarios: show the scenario name and scenario process description that is available for that specific module. Users can use this to better understand each scenario process. Each scenario can be enabled or disabled depending upon what needs to be tested.
- Data required sheet: this is where the data specific to each test run needs to be entered.

- Bold values: are to show that these values are unique, they need to be changed and be different every test run. As data entered into each field must be compliant with Oracle’s rules and must not have been used before. We recommend using a naming convention such as name initials, module name and follow with a number [RT_CM_01 or RTCM 01] so that the data can be easily located and understood. Also, if it is needed to rerun multiple times, users can change the unique data from RTCM 01 [which is already used] to RTCM 02 and so on.
- Regular values: are values that only needed to be input once, and don’t need to be changed unlike the unique values. For the purpose of the TRIAL, the users must copy the values from the Example data column to the Value column and use that data to run the testing.
- Data default sheet: are the global data. It is not mandatory for users to manually input values into this sheet. All data in this sheet should not be changed.
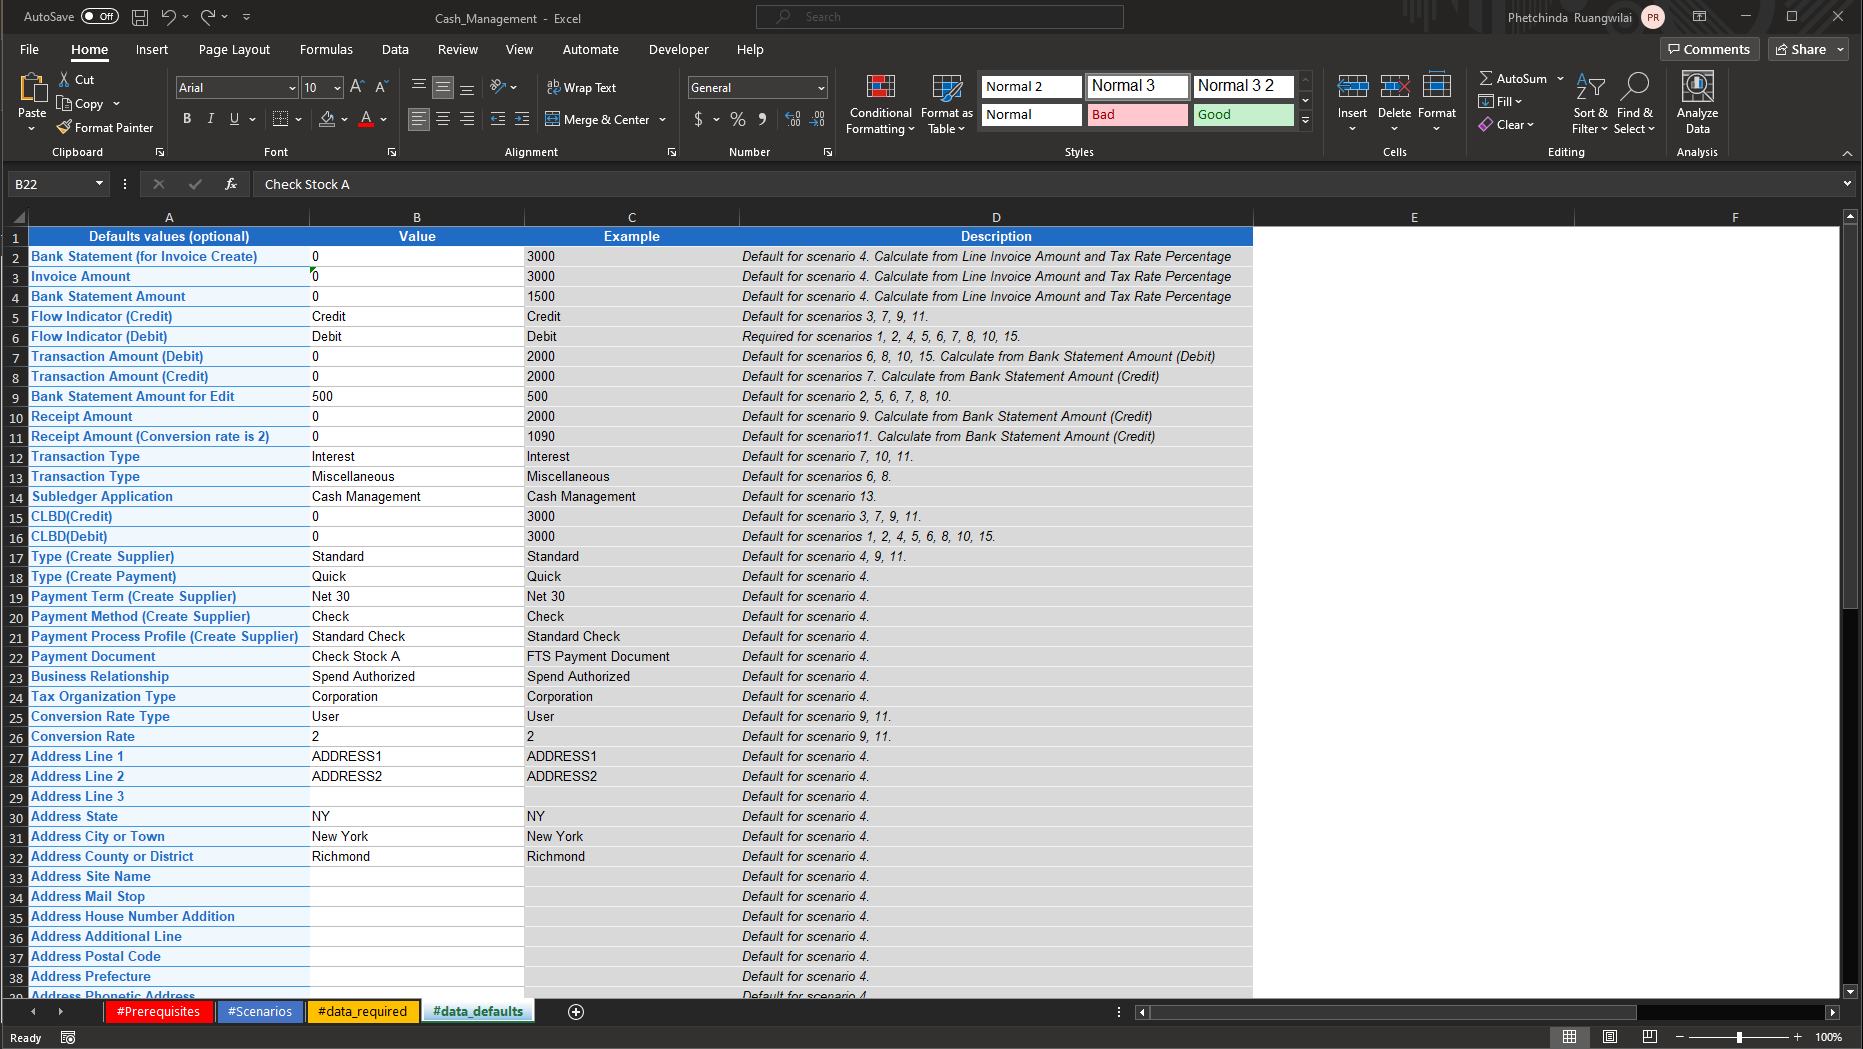
*Note that all information provided within each sheet will be different depending on the modules template.
END OF GETTING STARTED WITH RUNNING RAPIDTEST
2. SUBMIT & RESULT
Articles
2.1 Submit RAPIDTest
2.1 SUBMIT RAPIDTEST
After all data is prepared, save the excel sheet and proceed to run a test. To submit a RAPIDTest job, log back into the Rapid4Cloud platform if not already logged in and simply follow the few easy steps below.
On the platform dashboard, click ‘New’ and select ‘RAPIDTest’.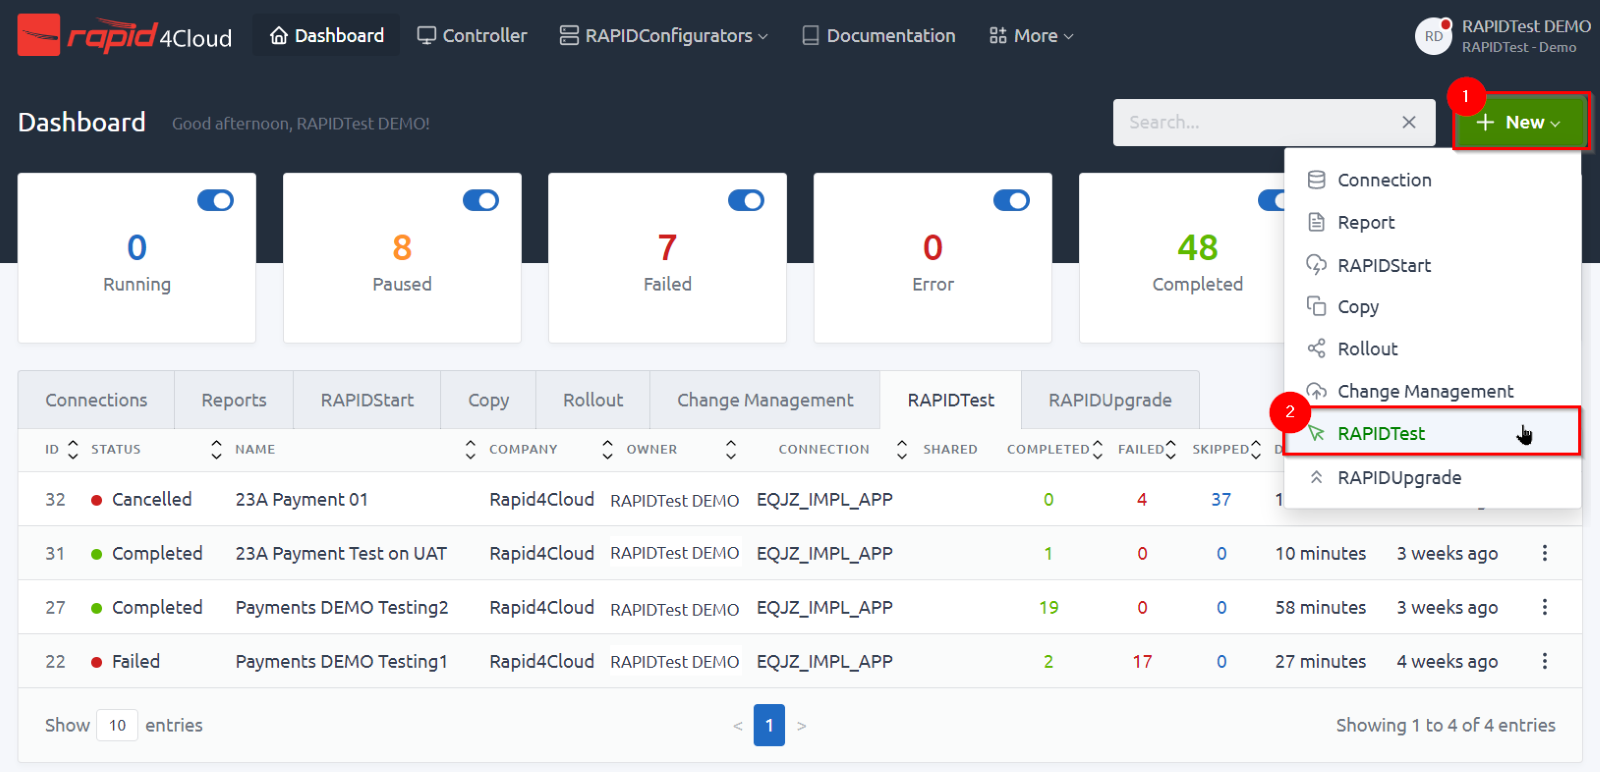 On the add RAPIDTest window, fill in all the necessary information.
 - Oracle app login:
-
- For Cash Management use this connection: TRIAL_CM-[RACHEL.BROWN]
- For Receivables use this connection: TRIAL_AR-[CECILIA.RAMIREZ]
- Import the file that you prepared.
- Name can be input in two ways.
-
- First, is to manually input the name of this test.
- Second, you can wait until the template file is imported and the name of that file will auto generate into the name.
* We do recommend that when creating a job, that a meaningful name is used so that it can help you to locate and understand the job when browsing through a long list of jobs.
- Customization:
-
- Run Tests in Parallel: if enabled, will run multiple scenarios at the same time instead of sequentially.
- Video: if enabled, will allow user to view the video of each individual scenario. Enabling this option will extend the time for the job to complete but is very informative when wanting to see the process or troubleshoot a problem.
After all information is completed, click ‘Add RAPIDTest’ and the new test will be shown in the RAPIDTest dashboard.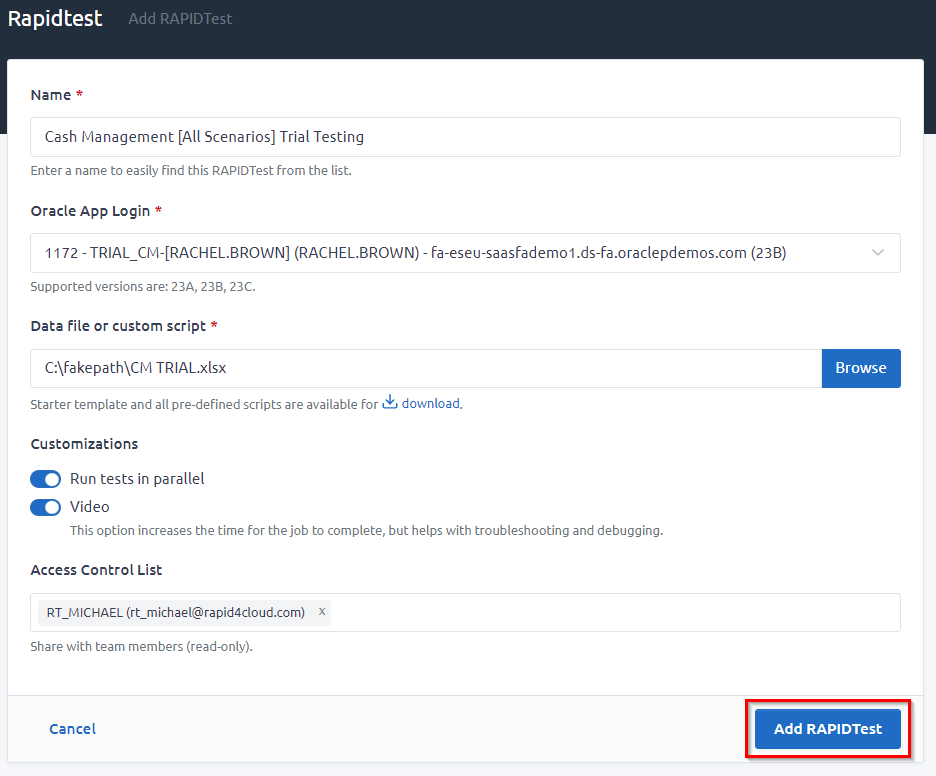
2.2 VIEW RAPIDTEST RESULT
Once a test is completed, there will be an email notification that will state that the test is either complete, failed, or cancelled. Click on the link provided in the email to view the details of the test or go to the RAPIDTest dashboard on platform, locate the test you want to check and, on the right, click on the ‘3 dots’ button and click ‘detail’.

On the detail window, notice, the left-hand side of the screen, will display all the general information of the run. Such as the job ID, the creation date and time, the connection user or download the template that was used to run the test.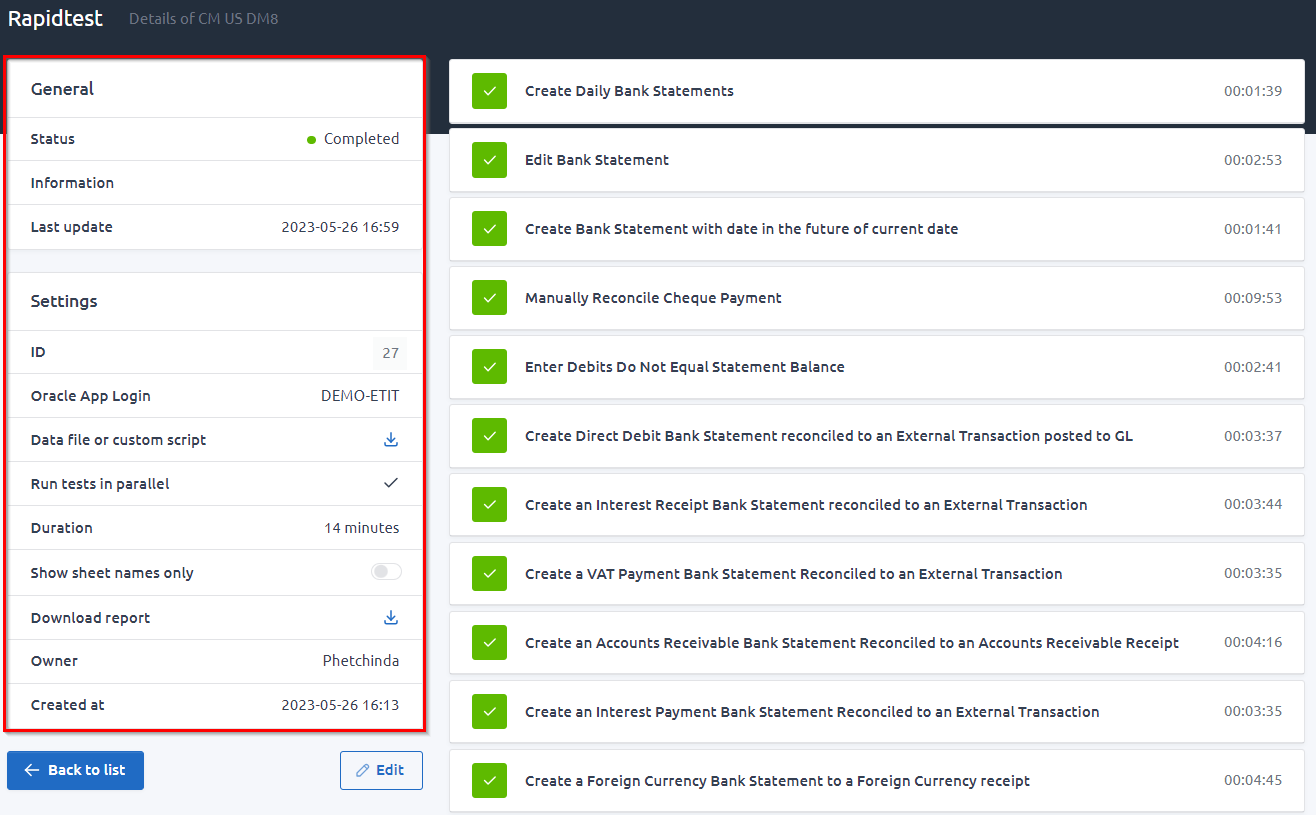 On the right side, are the scenarios, click to expand the scenario detail.
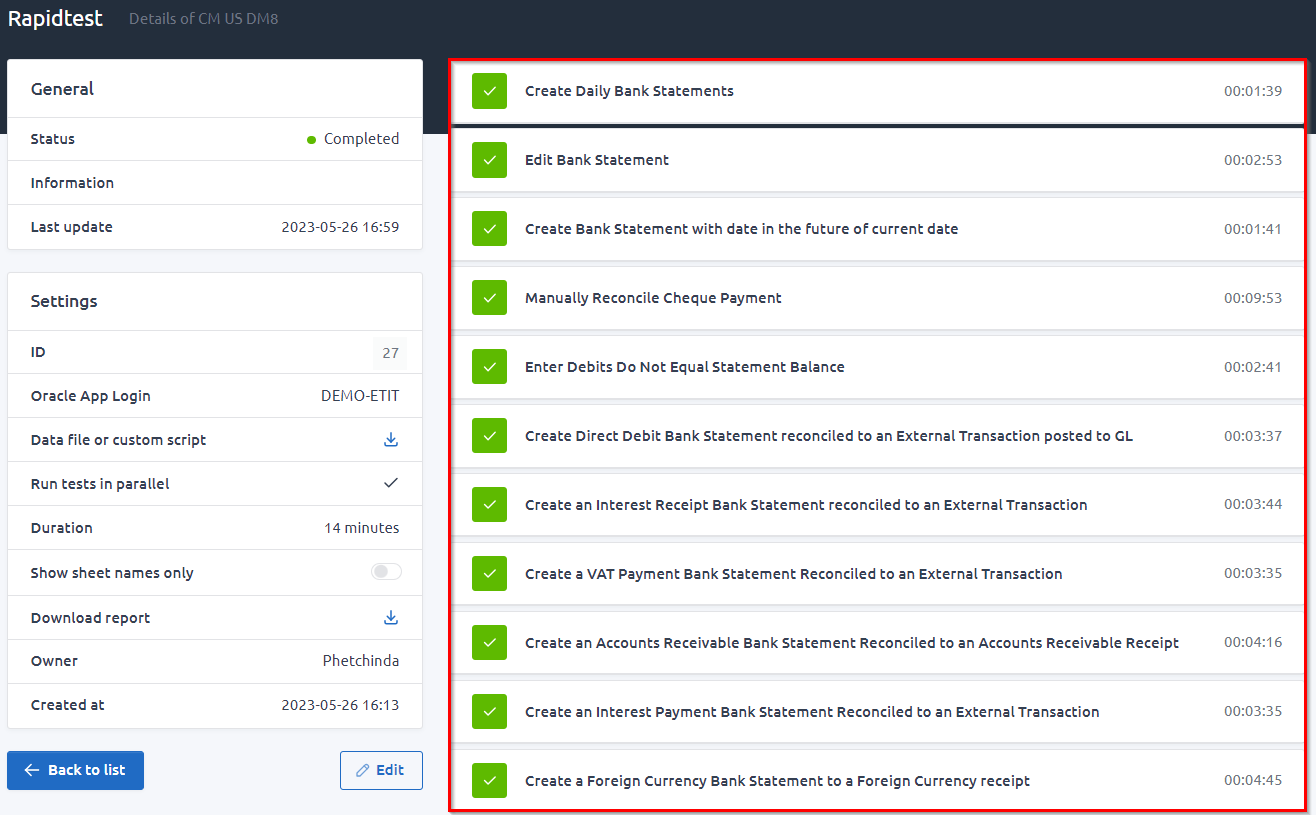 The following screen will appear where the Video, screenshots, variables used, and any Errors can be located.
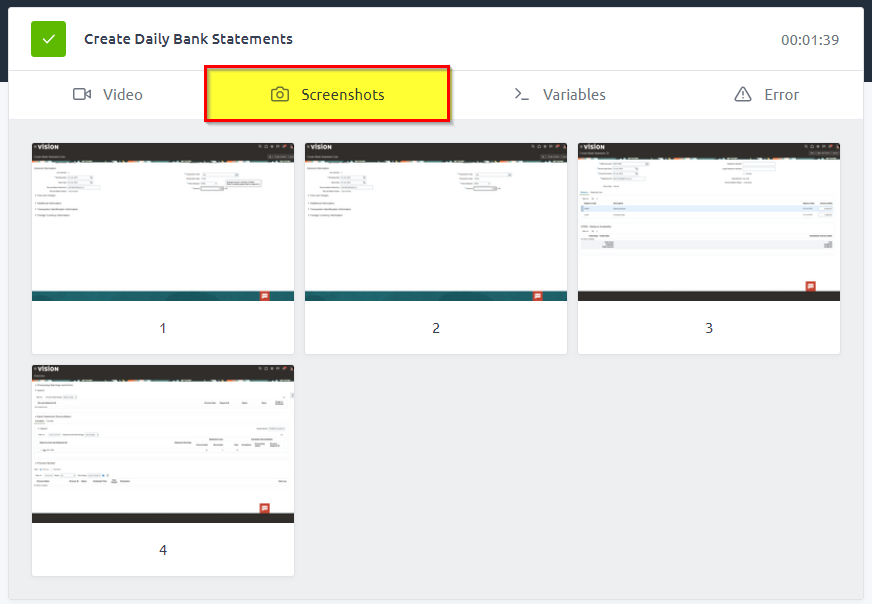


To view the Error[s] look at the description in the Pink line. From that line it should be possible along with the Video and/or Screenshots to determine the data error and correct the problem. If it appears the data is not the issue then log a support ticket to report the error and provide the error message shown in RED to assist the developer.
2.3 VIEW RAPIDTEST REPORT
The audit report is available to be viewed, downloaded and printed.
To view the report, either download from the RAPIDTest dashboard on platform or in the job’s detail window.
- To download from the RAPIDTest dashboard window.
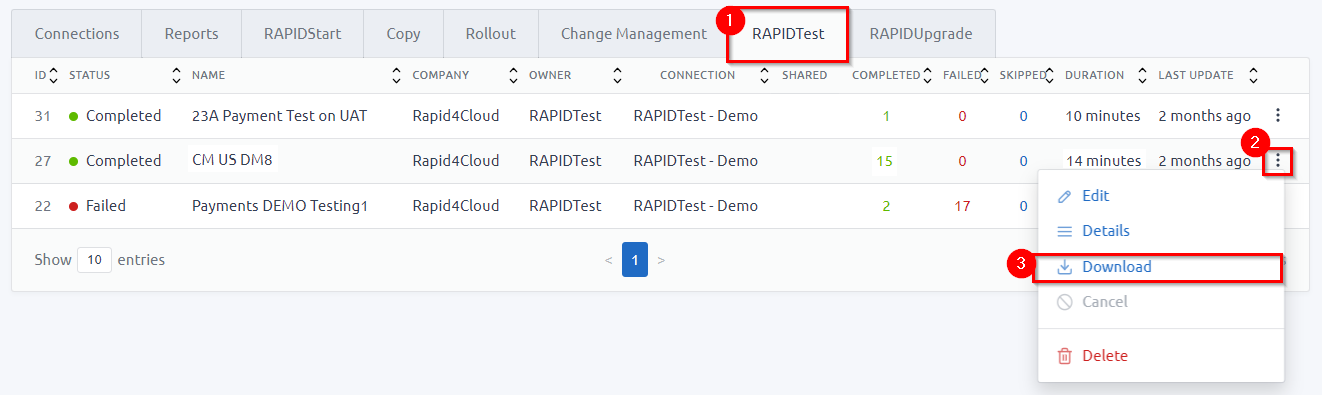
- To download from a job’s detail window.

Click to download the report and a new tab will open in the browser. The report will open as a PDF.
- On the report, will be the general informations.
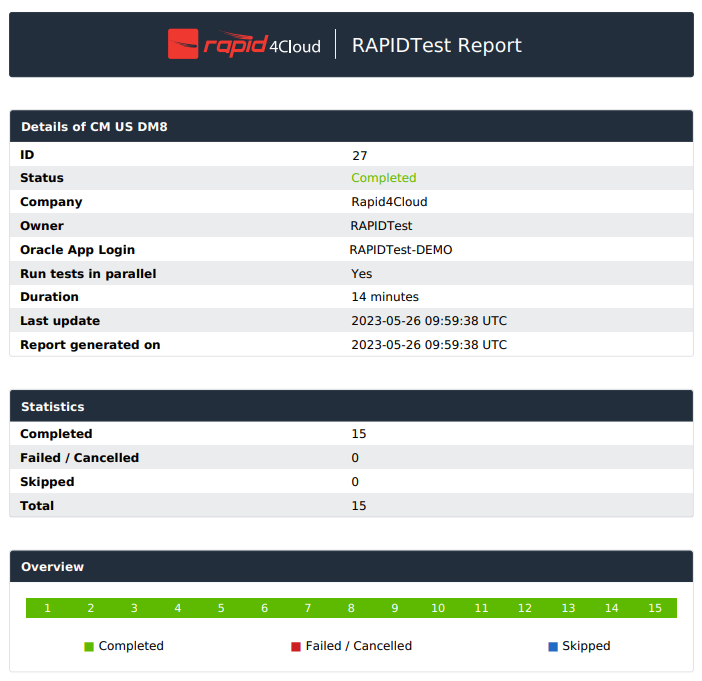
- The scenarios list, will show in green if successful, red if failed or blue if the scenario was skipped. On the scenarios line, will also display the total run time of each scenario.

- If the scenario failed during the testing process, the report would also show the error screenshot and messages.

END OF SUBMIT & RESULT